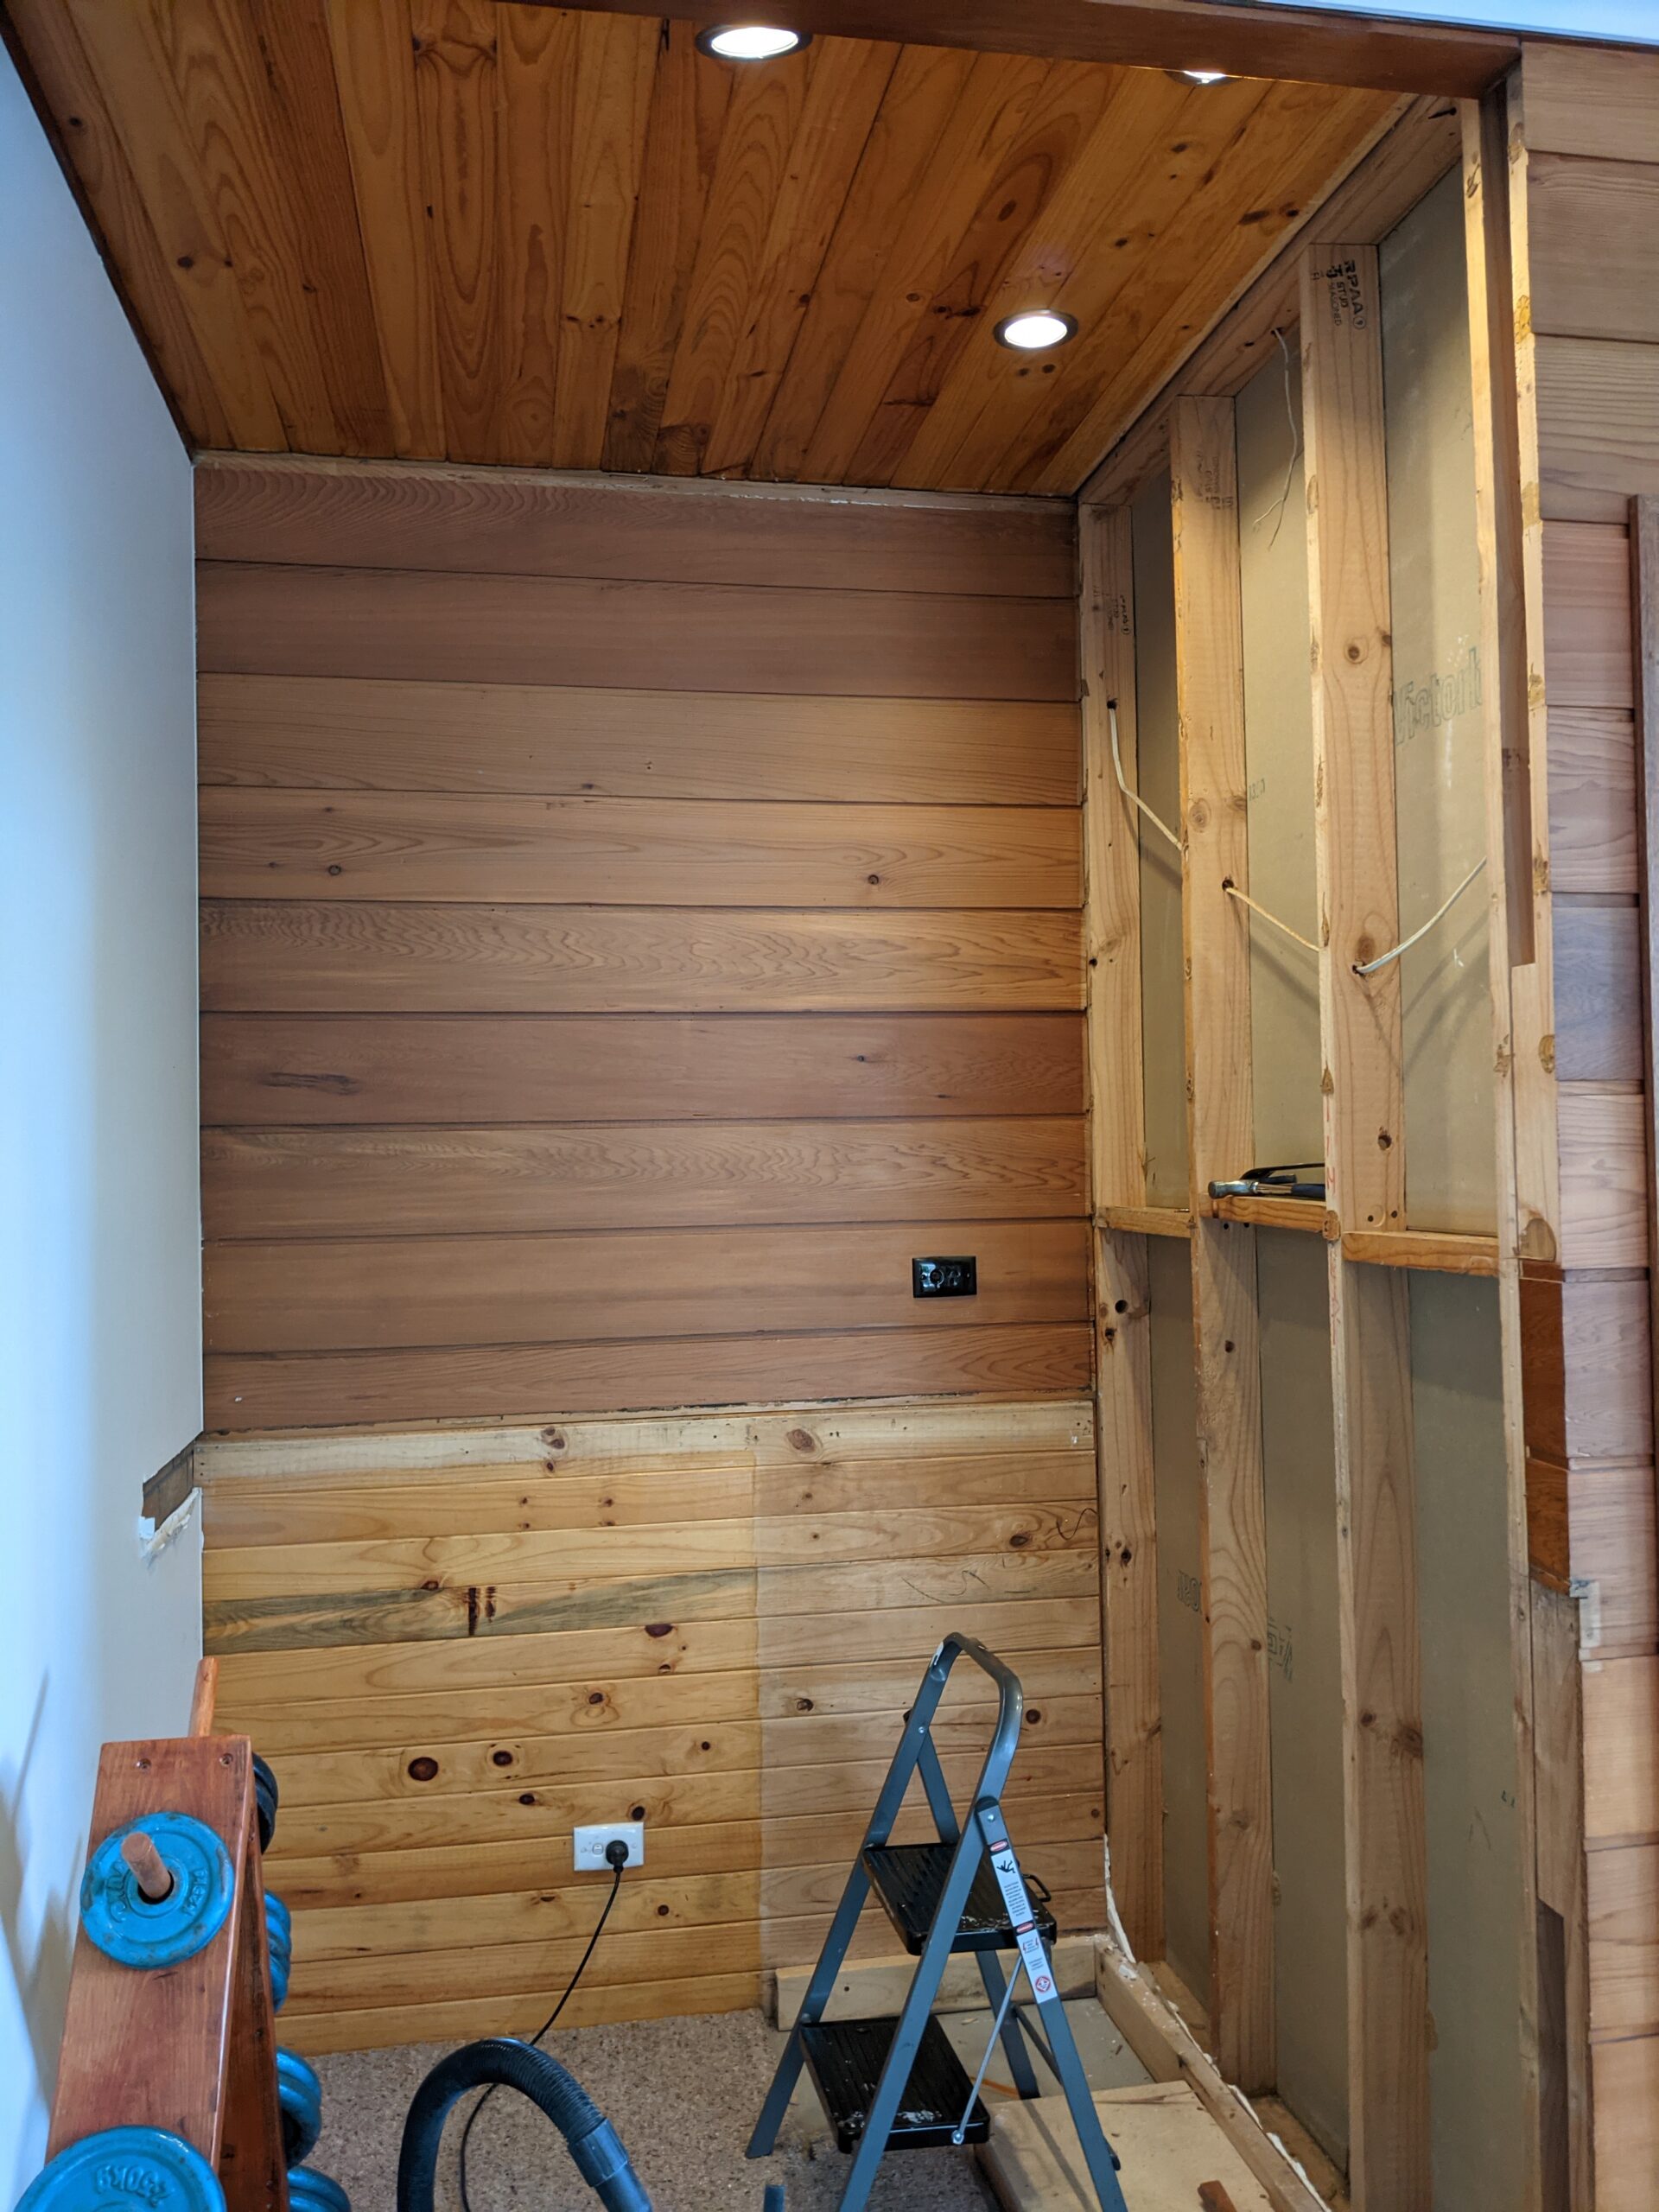

I’ve always like the idea of having a home climbing/bouldering wall and since we got this place i always said that an old bar nook would be a good place for one. I took the old bar out not long after we moved in when i built the new one and the nook has just been a junk storage place since.
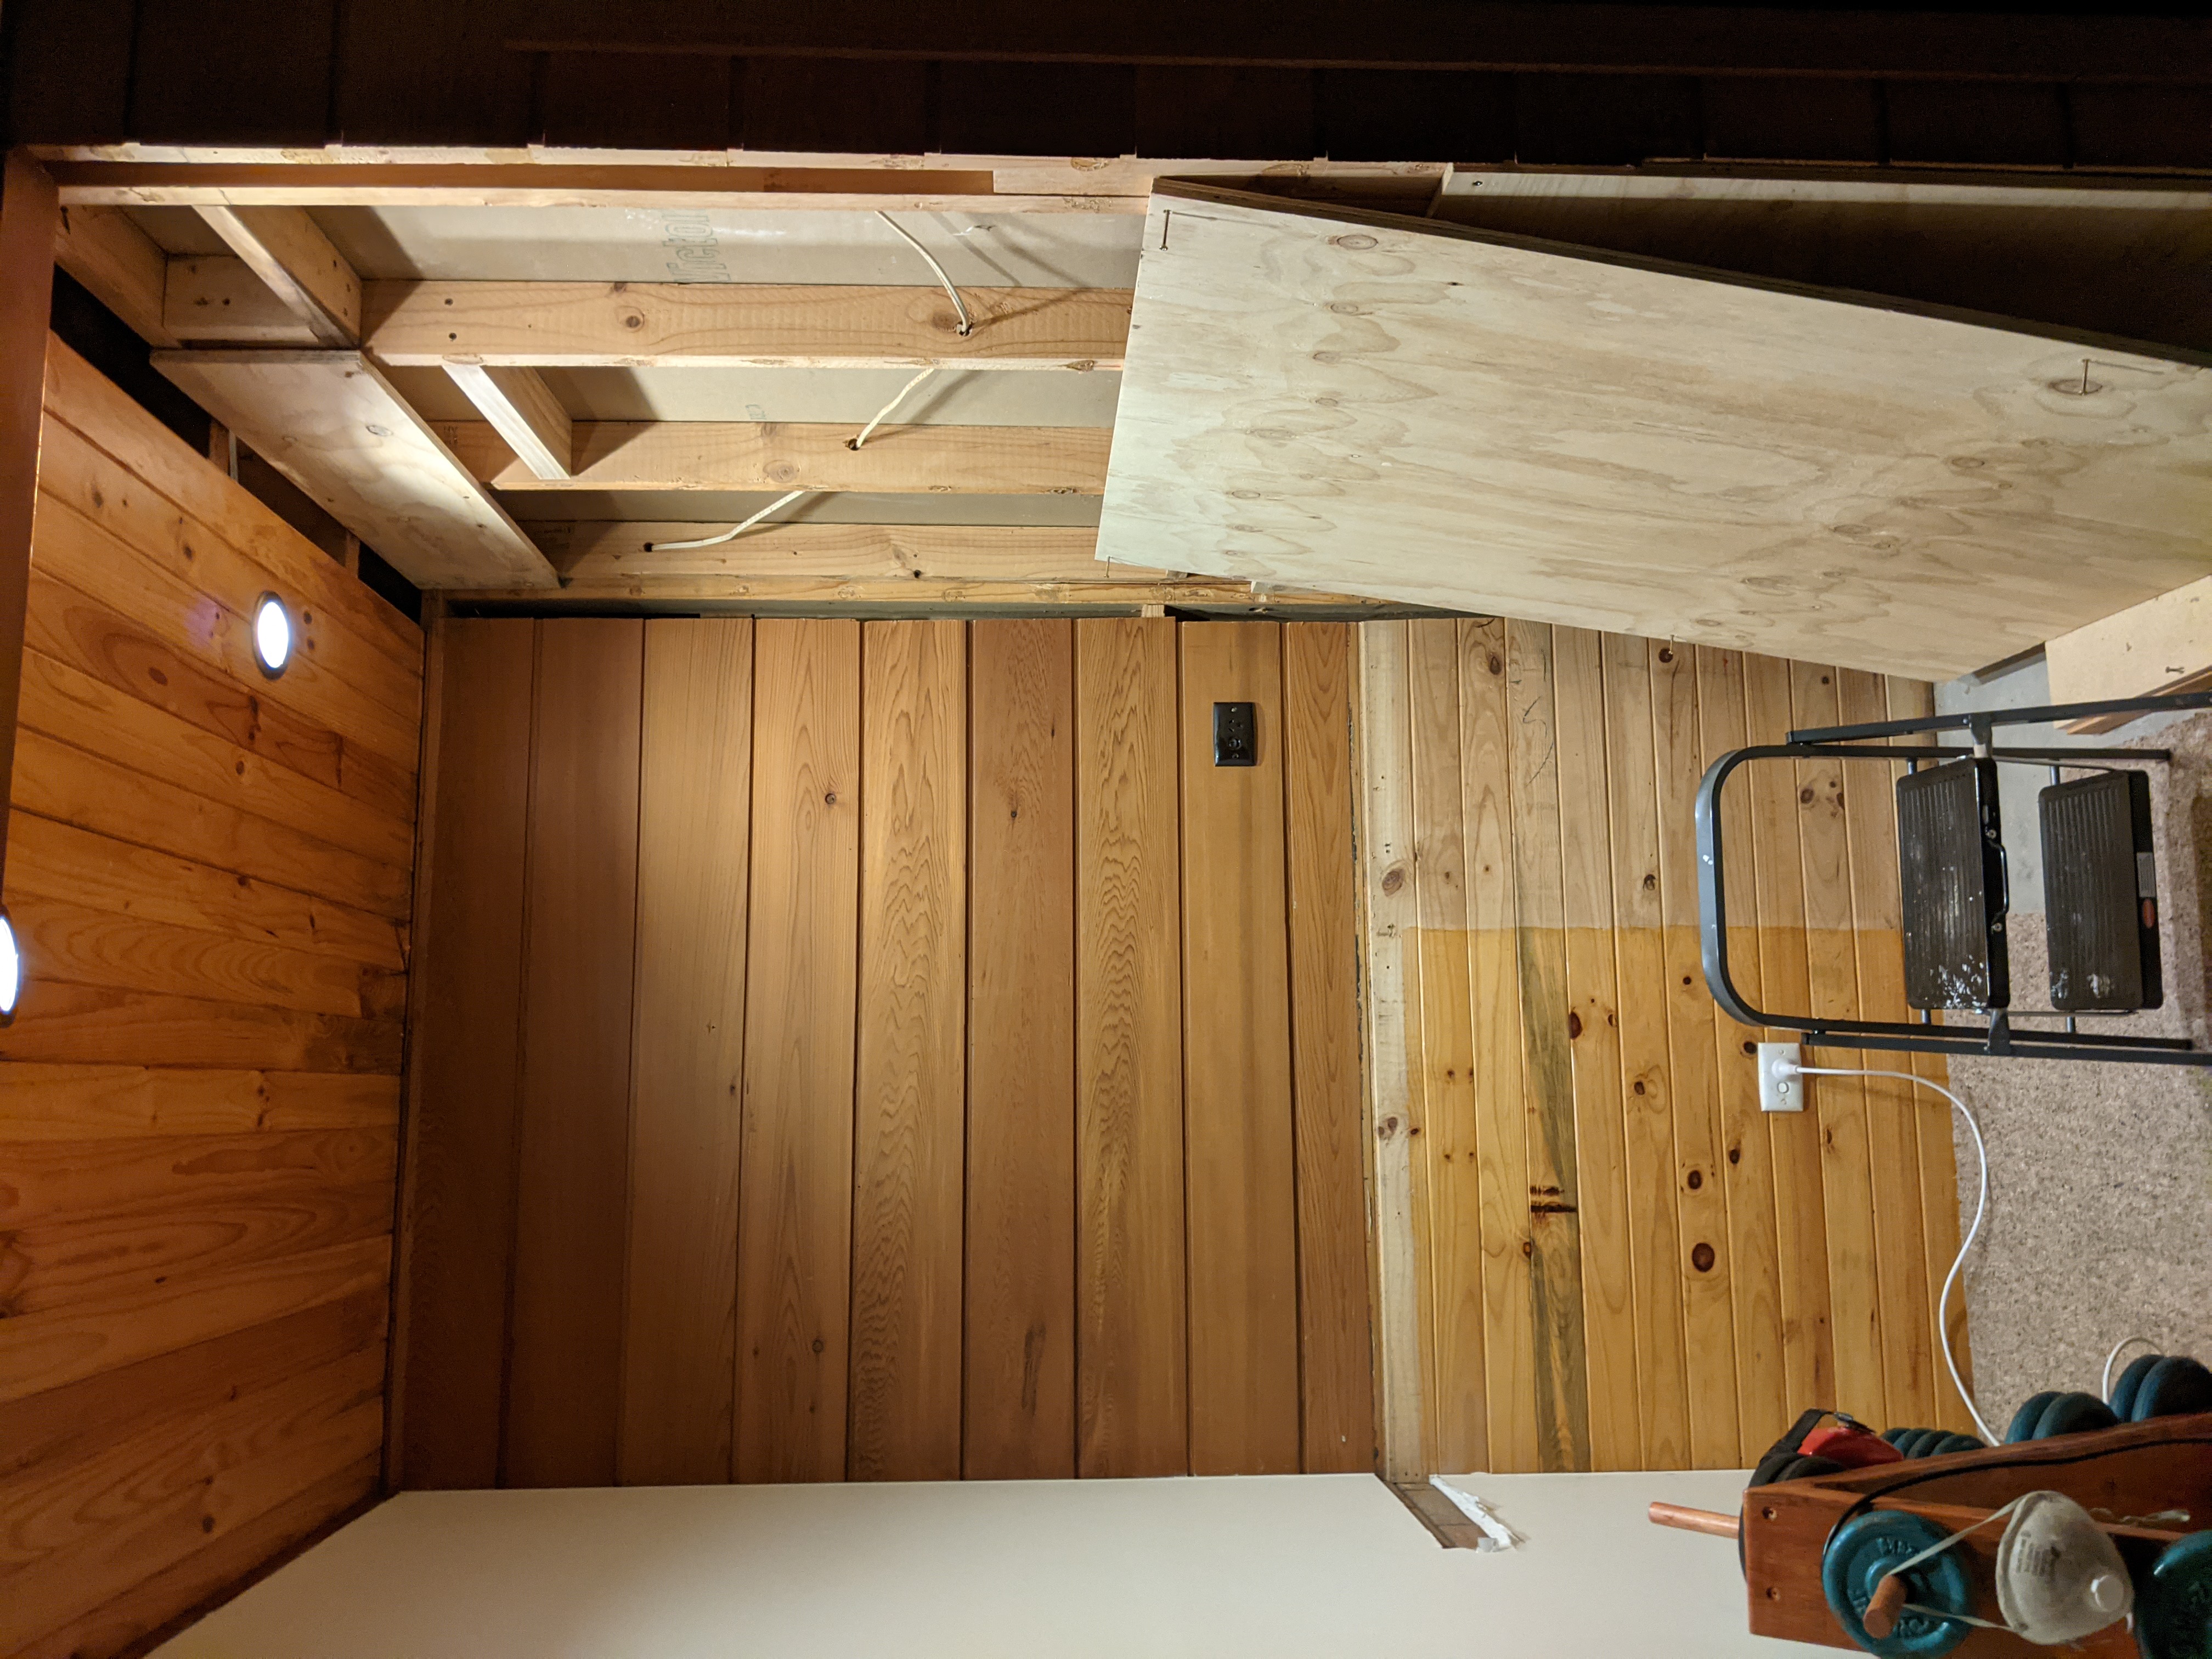
Rather than going the whole hog and building in one go i did it in phases to decide if i was going to use it and it worked ok. Phase 1 was just a straight side wall just screwing the plywood into the existing studs + a few extra noggins that i added. The width was awkwardly wider that the width of a ply sheet and higher than a sheet so i had a few small off-cuts to fill in the top after adding some extra stud work.
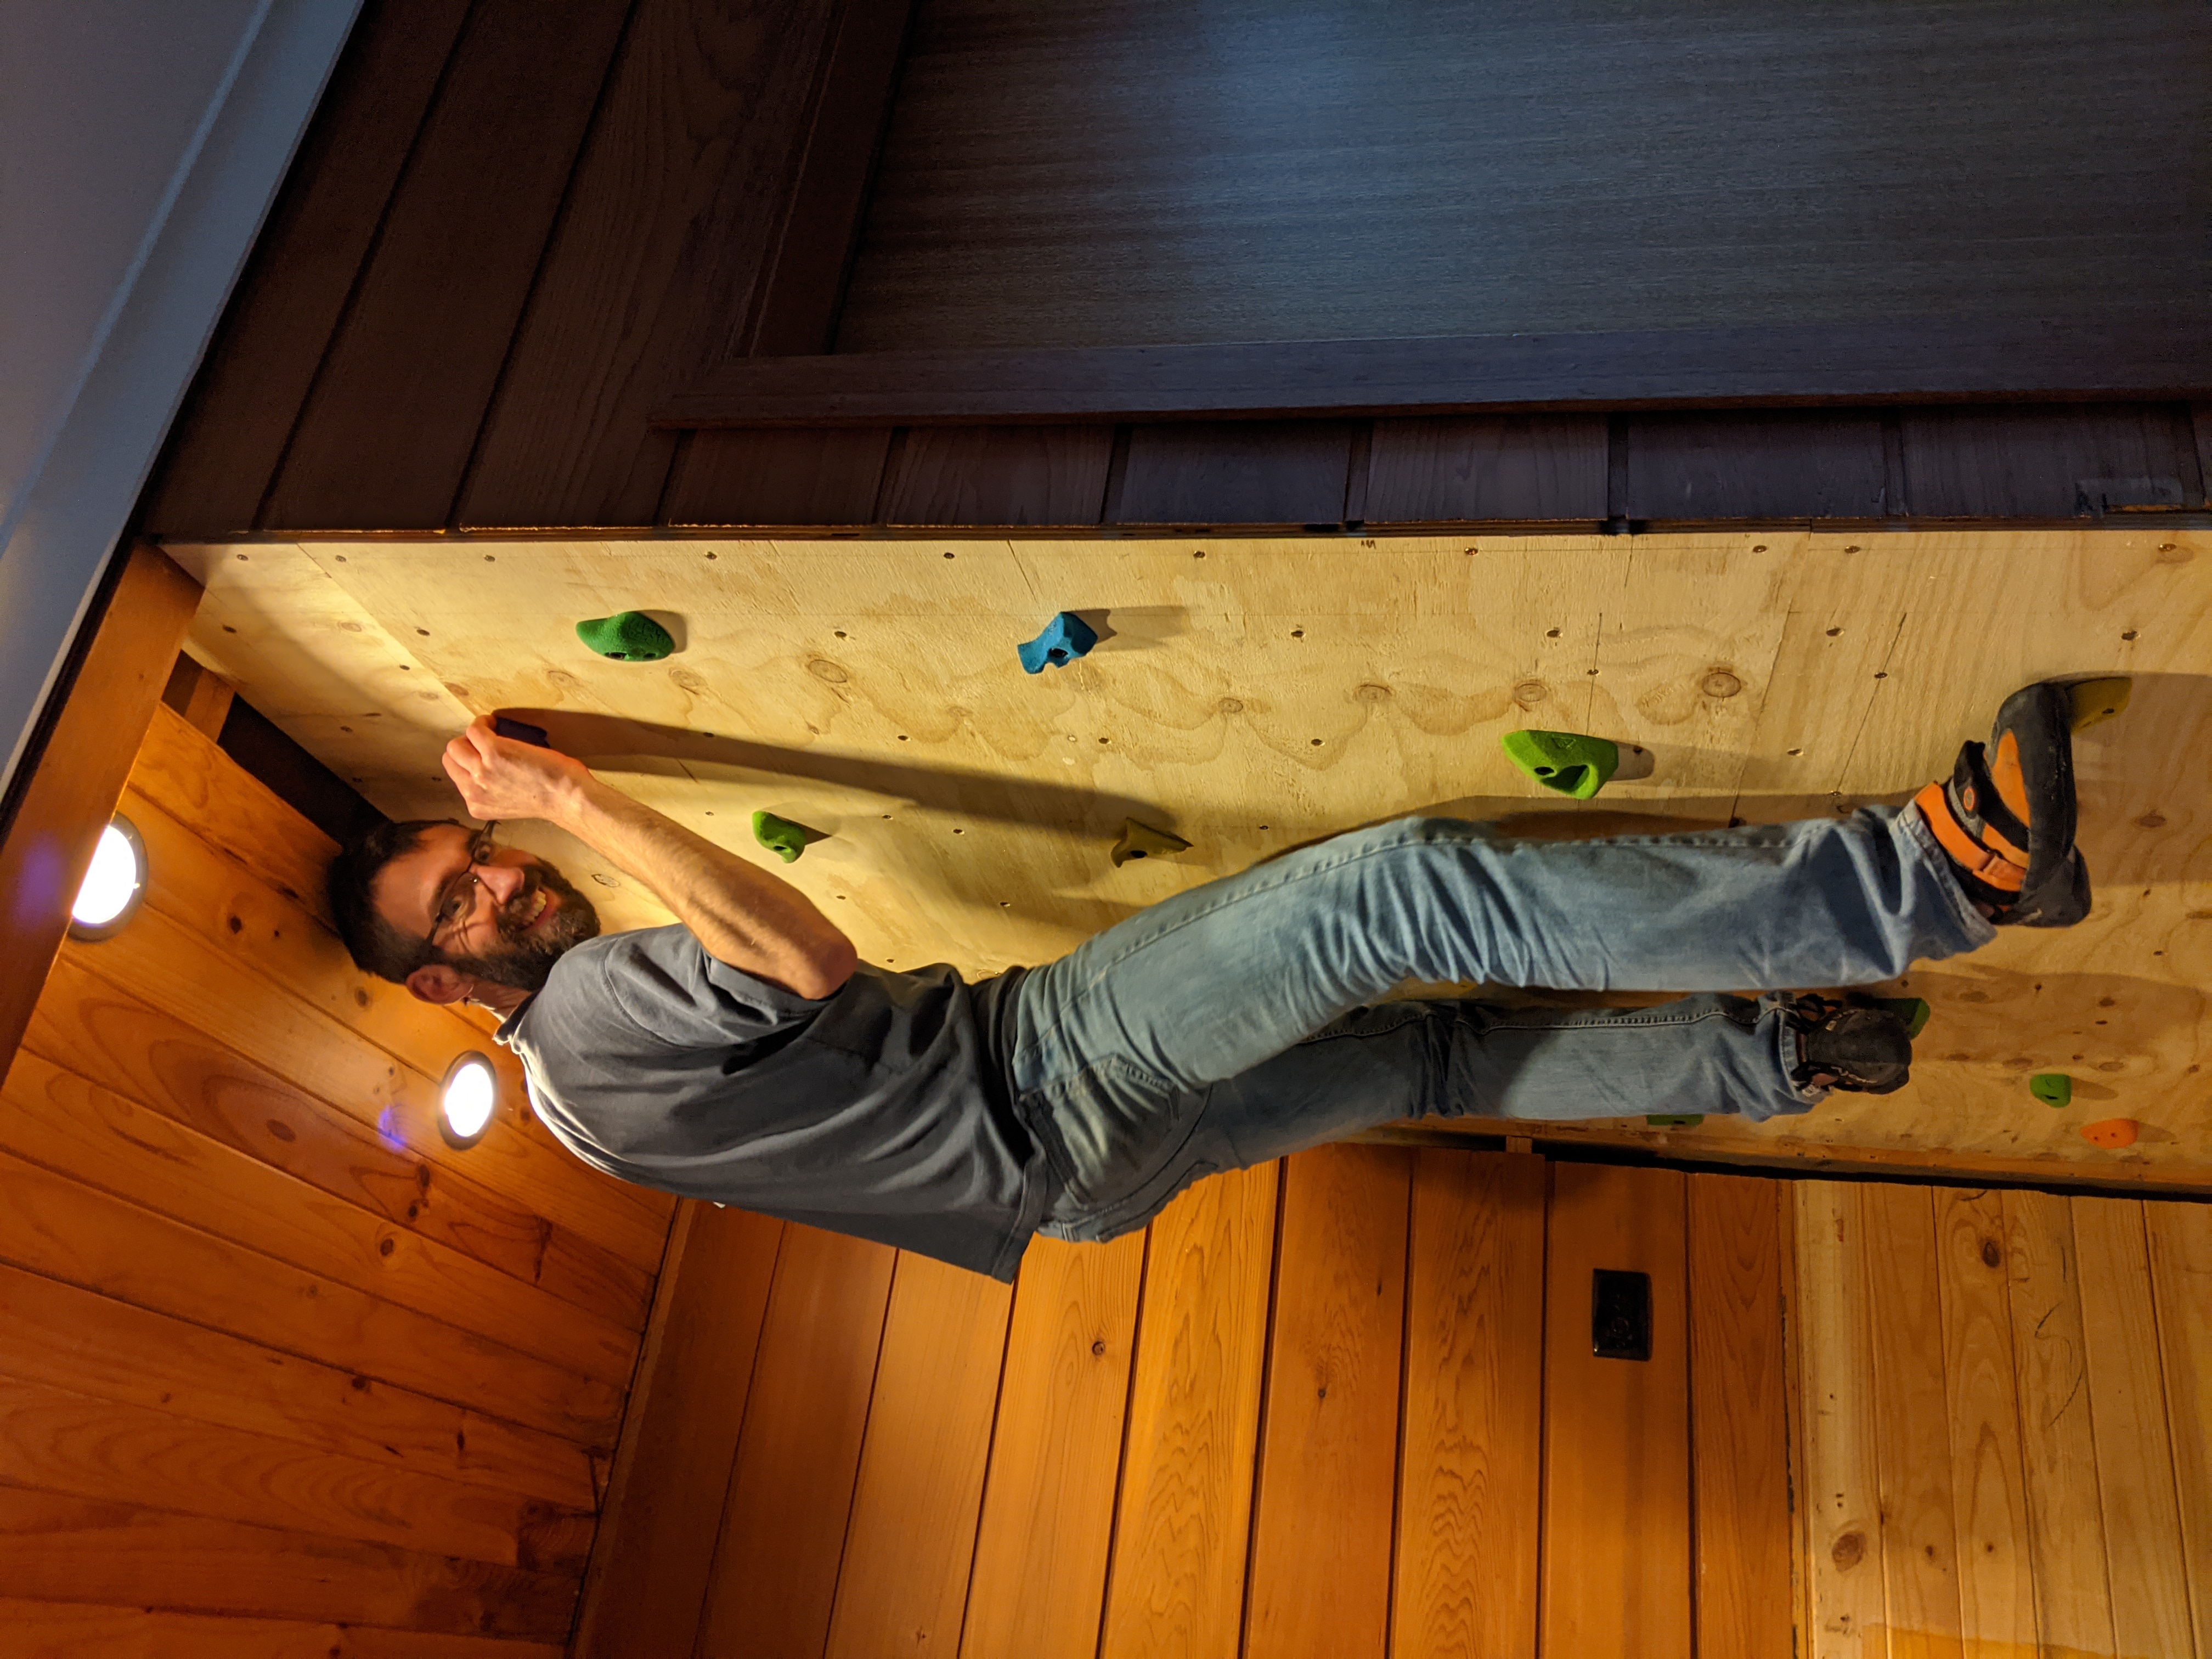
I used this a few times a week it was good to have and certainly build up some old climbing strength and remembered some techniques. As we went into yet another lockdown and Michelle told me i should aim to do the next phases before the New Year i figured that i may as well crack on with it.
I used this a few times a week it was good to have and certainly build up some old climbing strength and remembered some techniques. As we went into yet another lockdown and Michelle told me i should aim to do the next phases before the New Year i figured that i may as well crack on with it.
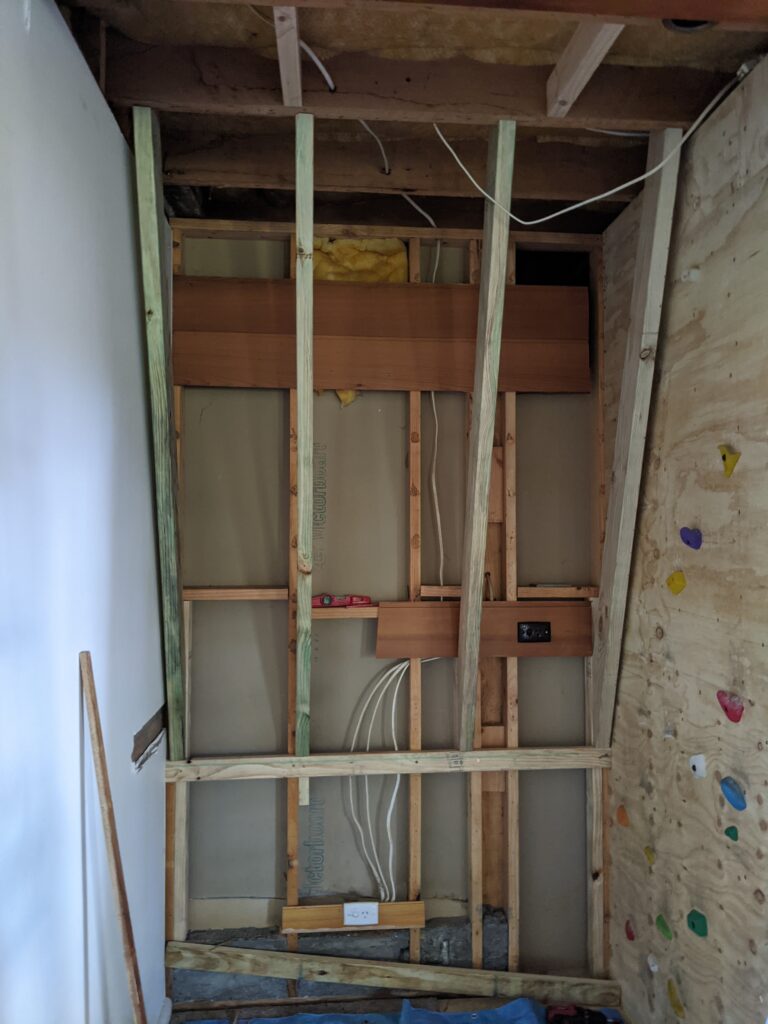
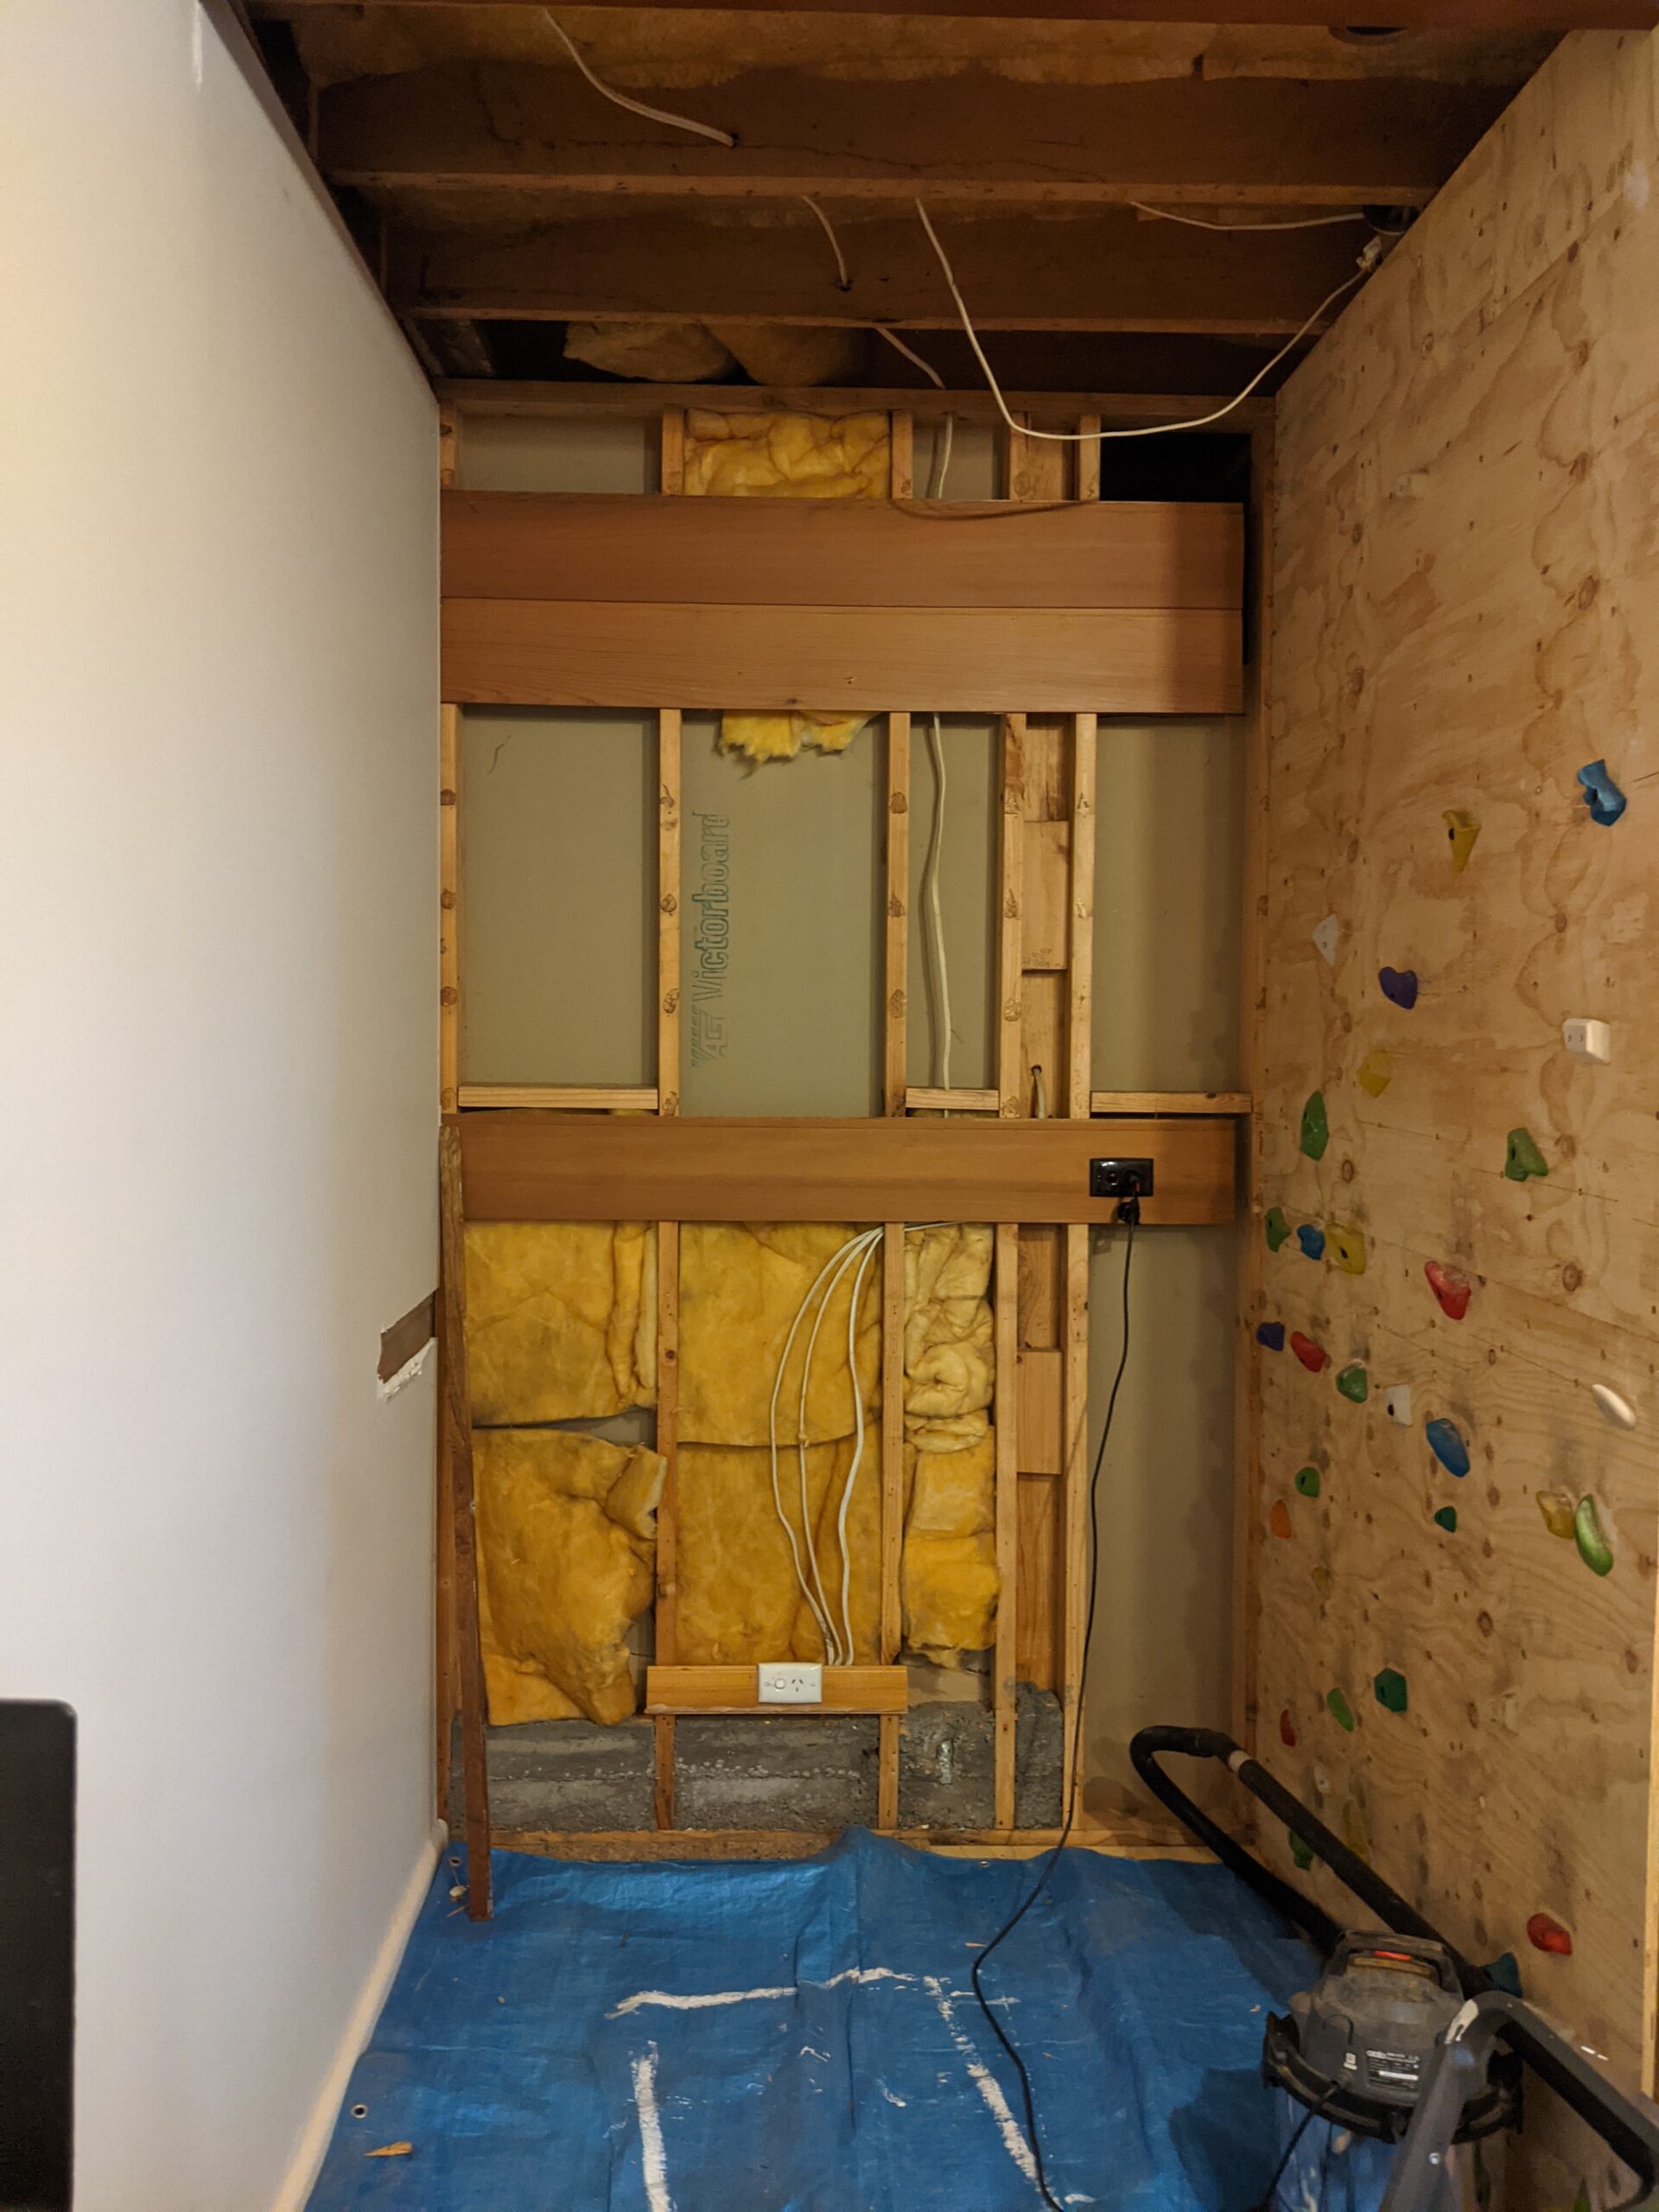
I eventually managing to get hold of some timber, I had to resort to treated timber for the studs as there is a shortage in Australia at the moment. The next phases were to add an overhang and add the left wall too. After stripping the old wood off the wall i added some horizontal beams into where the bottom of the overhang would be. I could then cut the beams for the overhang, these were shaped to fit around the horizontals and into the ceiling joists that run perpendicular. After that i added a few noggins and plates to attach to the existing ceiling joints and wall studs.

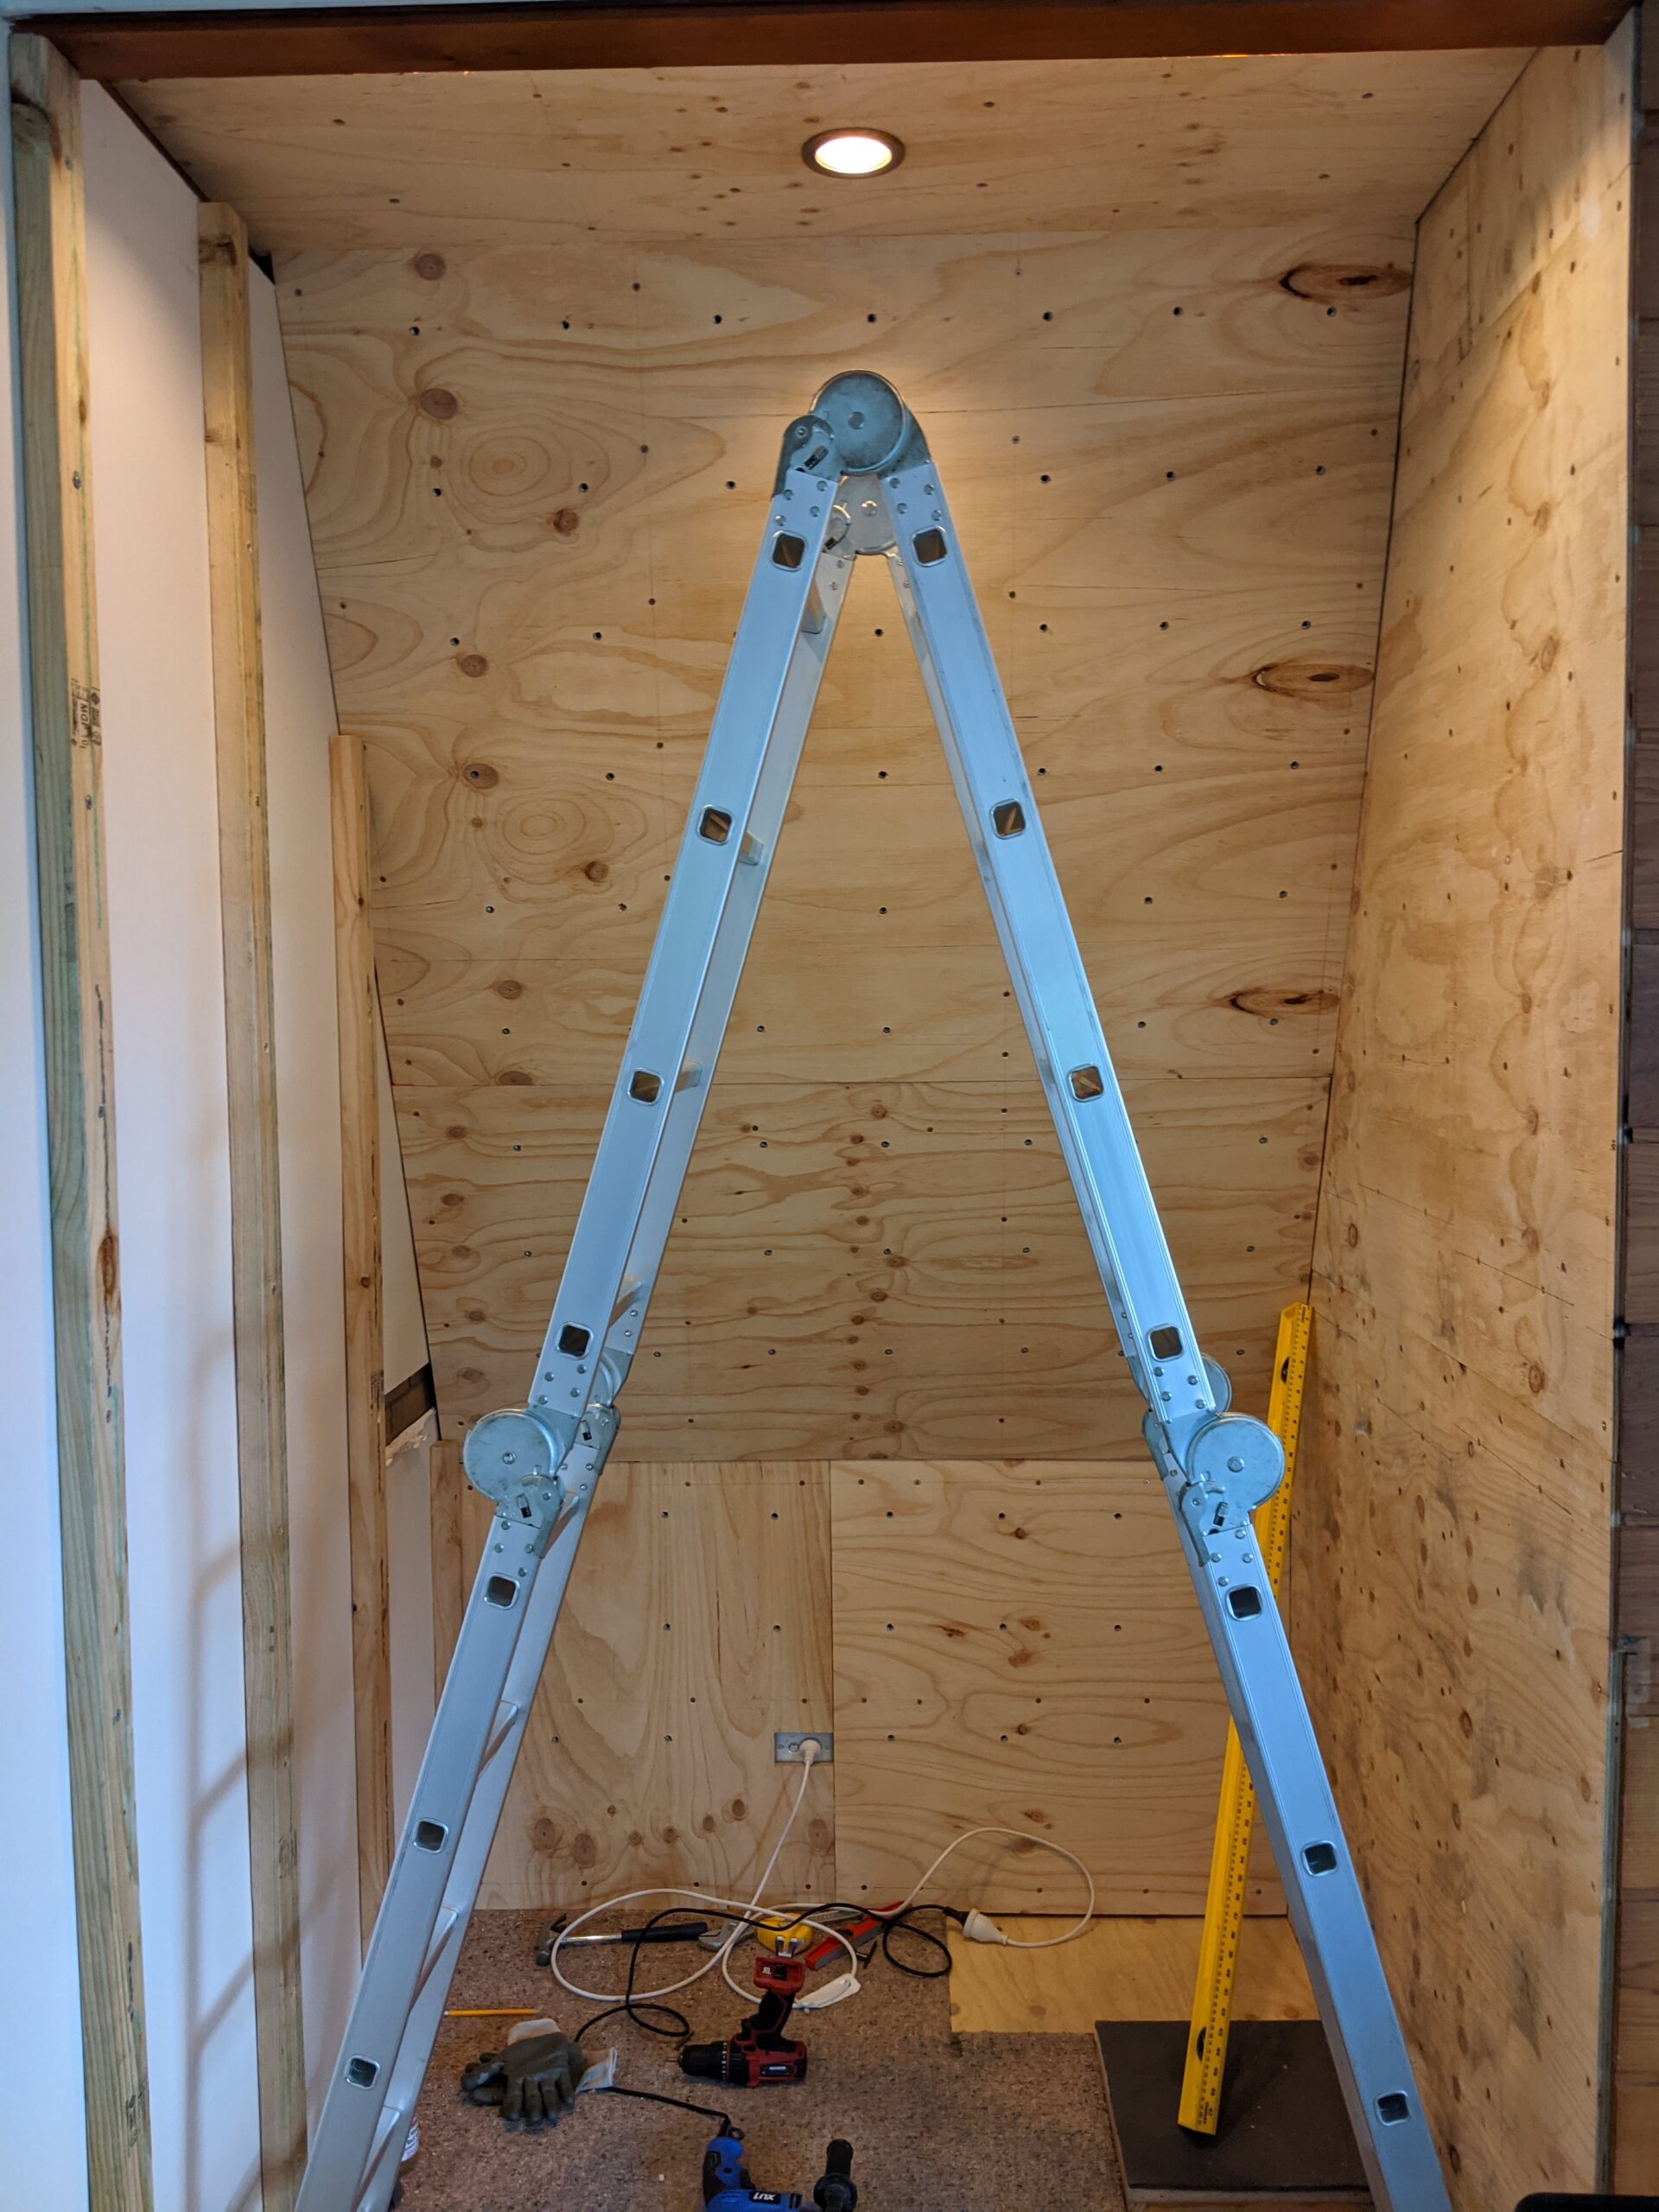
The next step was cutting the plywood panels to size and marking up with the positions of the timber behind so i could drill the holes for the t-nuts in the right place at ~200mm spacing. I also drilled and countersunk pilot holes for the screws to hold the panel in place also at 200mm spacing. I also added a few noggins between the ceiling joists and attached a ceiling piece.
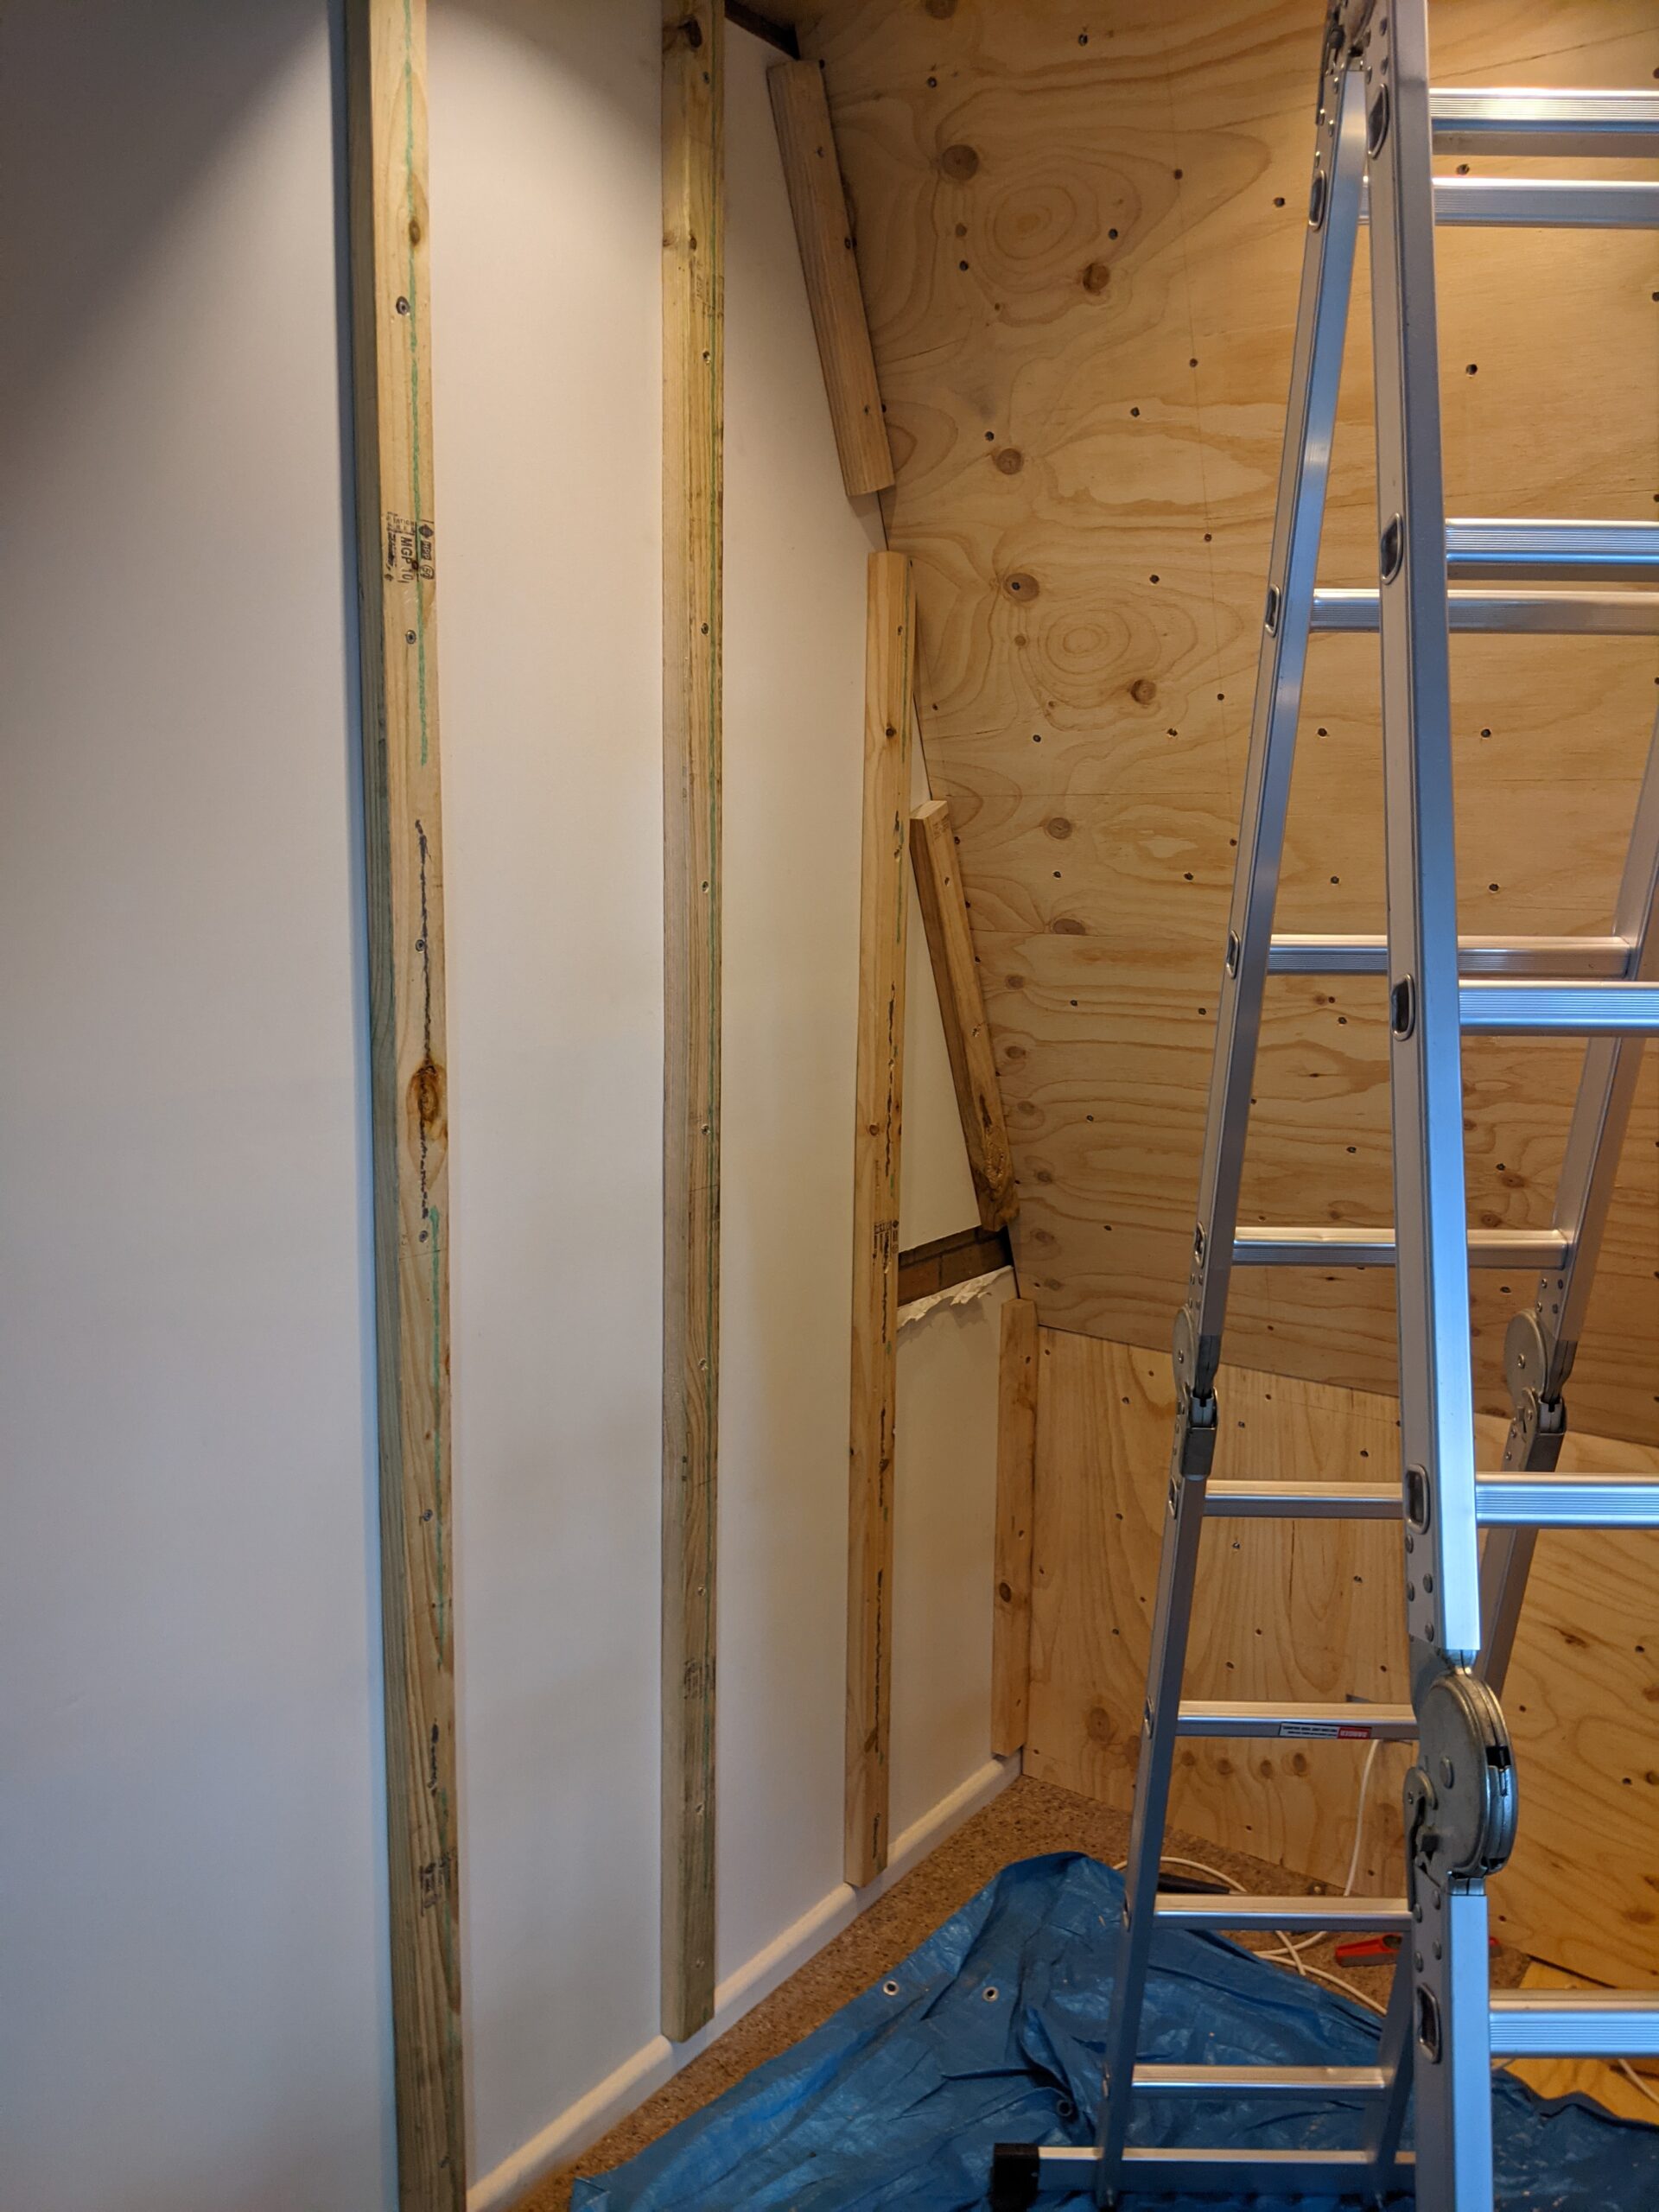
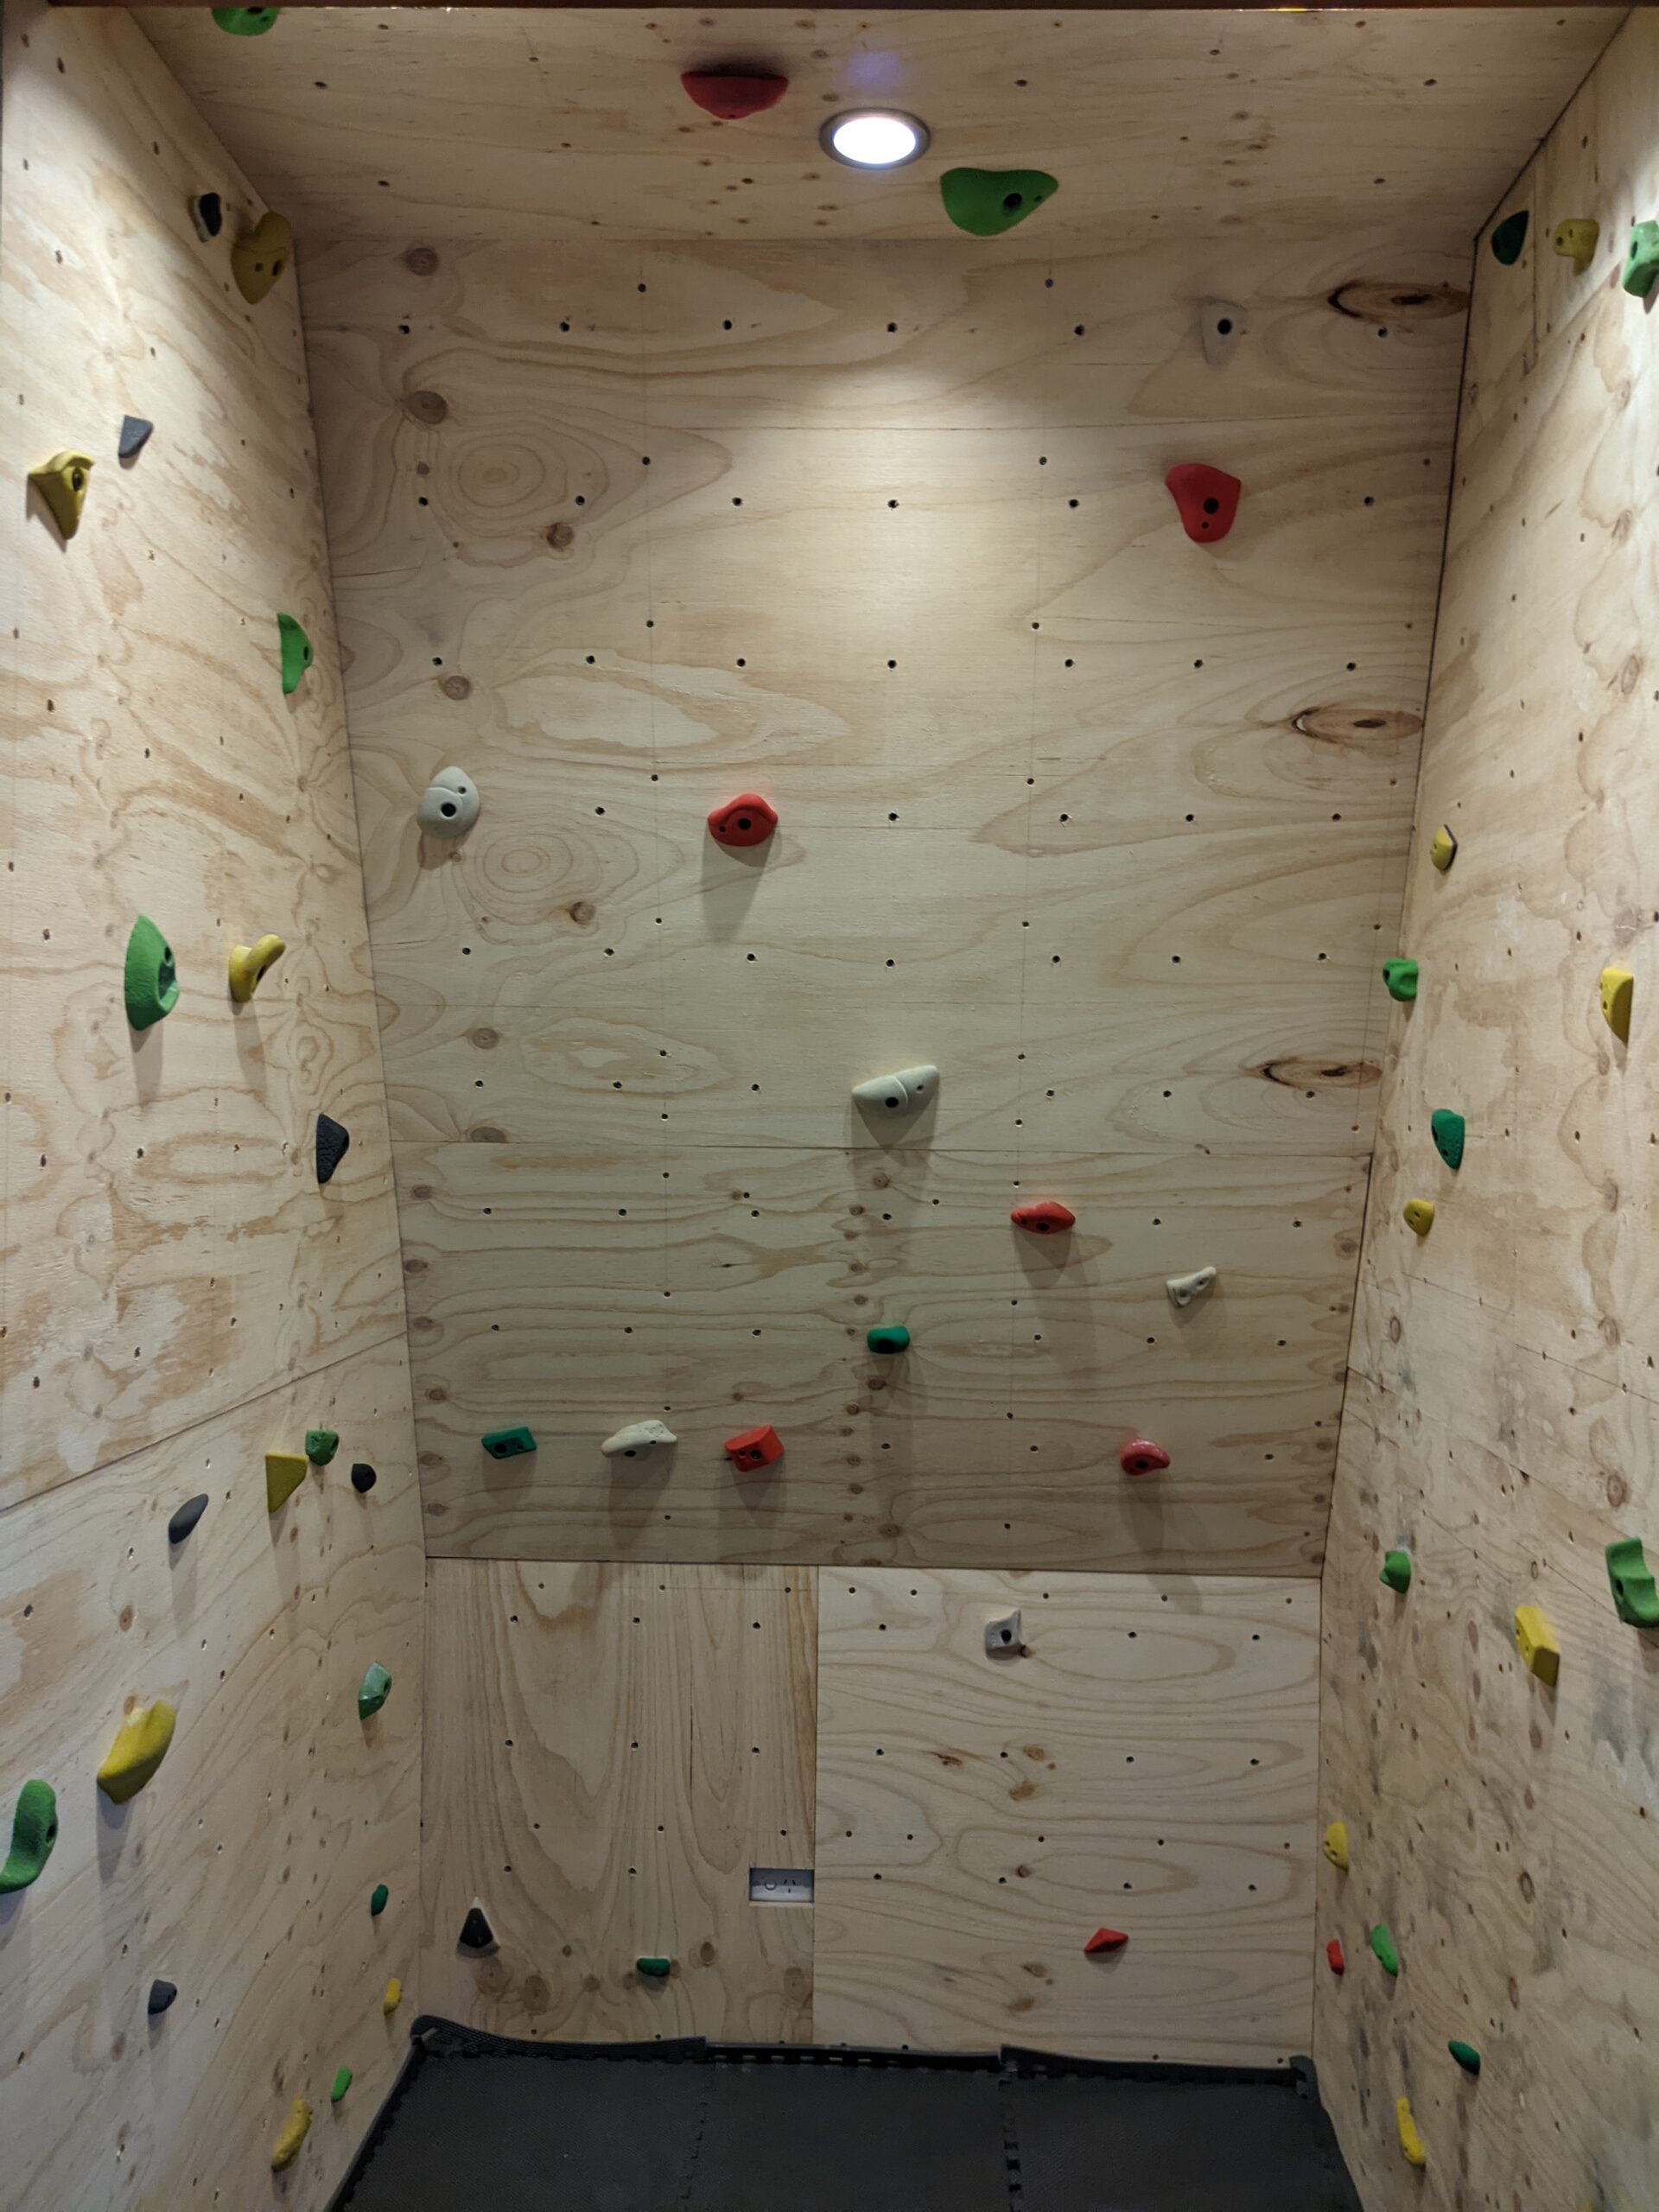
The right hand wall is a brick wall so i decided to attach studs using masonry screws which was a massive pain as it is super hard brick! I added the studs on top of the plasterboard so the studs can be removed and the wall re-plastered if the wall is taken down i the future. I cut the sheets and attached them to these studs again at 200mm screw spacing.
The holds i have been buying when i have found deals online, i’ll probably need some more going forwards so will keep an eye out for deals. Now i just have to get my strength and technique back up, i was quite surprised how much upper body strength i have lost. I’ve probably switched upper body strength for lower body strength with all the cycling!